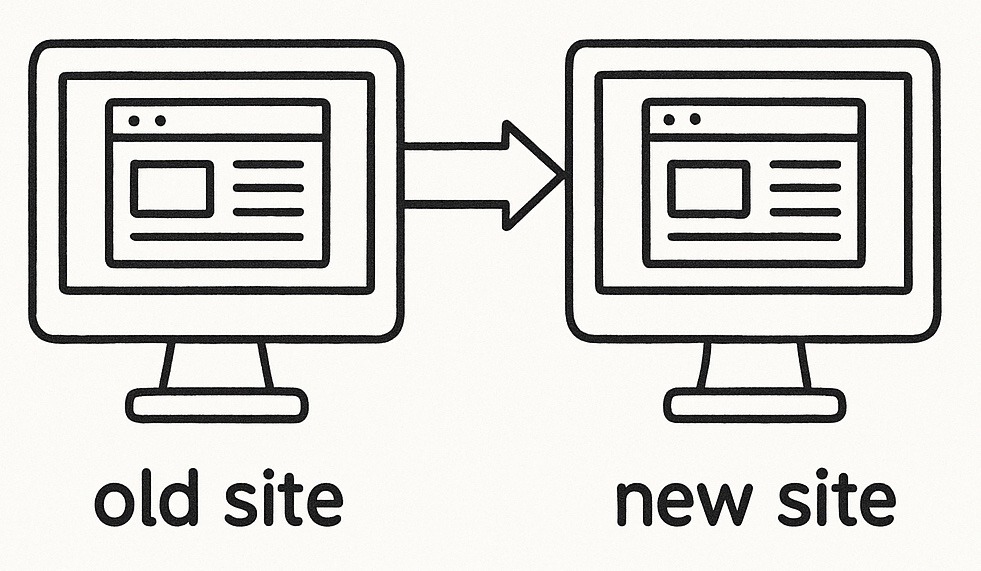
A blog or website migration either runs smoothly or turns into a headache. When you move to a new content management system, consolidate domains, or overhaul your site architecture, you take on a project that demands careful planning. Handle the change well and you improve user experience, preserve rankings, and set the stage for future growth. Rush it and you risk lost traffic, broken links, and a drop in search visibility.
This guide supports digital marketing managers, developers, and website owners. It outlines a clear, actionable SEO migration framework based on industry best practices. Every step follows Google’s official guidance to help you manage a smooth transition and keep search performance on track.
Key points
- Plan the migration around a clear keyword strategy and content map before changing any URLs or templates.
- Give every important page on the old site a clear destination on the new site and use 301 or 308 redirects for permanent moves.
- Allow genuinely retired pages to return a 404 or 410 status instead of forcing irrelevant redirects.
- Clean up legacy redirect chains so every redirect jumps straight to the final URL.
- Update XML sitemaps, canonicals, and internal links so they reflect the new URL structure from launch day.
- Migrate images, metadata, and structured data carefully to protect visibility in Google Search and Google Images.
- Review and, where possible, update high-value backlinks so they point directly at the new URLs.
- Monitor Google Search Console and analytics closely for several weeks after launch and fix issues as soon as they appear.
Table of contents
- Revisit your keyword research
- Identify long-tail opportunities
- Migrate blog posts from HubSpot to WordPress
- Build a full URL mapping strategy
- Audit existing redirects
- Decide on your AMP strategy
- Fix redirect chains before launch
- Update your XML sitemap
- Migrate and optimise image URLs
- Restructure URLs with SEO in mind
- Find and fix 404 errors
- Update your most valuable backlinks
- Post launch: monitor and optimise
- Final checklist
Revisit your keyword research
Before you change anything, revisit your keyword strategy. A migration gives you the perfect moment to check whether current targeting still aligns with business goals.
Run an audit that covers:
- Top-performing pages and terms: Which keywords currently drive traffic and conversions?
- Keyword gaps: Which topics and questions sit in the backlog with no content?
- Business alignment: Does your targeting still match the right intent and audience segments?
Use tools such as Google Search Console, Ahrefs, and SEMrush to gather data. Map each primary keyword to a page on the new site so you preserve visibility when URLs change.
Identify long-tail opportunities
Long-tail keywords usually bring lower competition and higher intent. They often deliver quick wins that support traffic growth while the migration settles.
Look for:
- Under-optimised pages or blog posts with steady impressions but weak click-through rates.
- Pages that lack clear metadata, headings, or internal links.
- FAQs and support content that you can structure more clearly or expand into guides.
When you target these opportunities early, you build momentum after migration and support your wider SEO roadmap.
Migrate blog posts to WordPress
If you plan a platform switch, such as moving from HubSpot to WordPress, treat the blog as a priority. Blog content can often generate a large share of organic sessions and assists with connecting with your target audience to drive conversions.
Use this process to handle the move:
- Export all content, including metadata, authorship, categories, tags, and publish dates.
- Rebuild formatting inside the new theme so readers still enjoy a clear, consistent layout.
- Update internal links so they match the new permalink structure.
- Refresh meta titles and descriptions for each post where performance looks weak.
- Set up 301 or 308 redirects from each old HubSpot URL to the correct WordPress equivalent.
Check internal linking carefully and keep anchor text relevant. Strong internal links protect user journeys and help search engines rediscover key posts quickly.
Build a full URL mapping strategy
Plan the redirect map before you touch anything in production. Give every important page on the old site a clear destination on the new site so you protect rankings and send users to the right content.
Shape your redirect map so it:
- Covers all live URLs that still offer value, not just the top performers.
- Uses 301 or 308 redirects (permanent) when you move content for the long term.
- Reflects the new site structure and folder hierarchy.
When a page no longer has a useful equivalent, let that URL return a 404 or 410 status rather than forcing a redirect to something unrelated. This approach lines up with Google’s guidance on 404 pages and soft errors.
If your blog content now lives on a new domain, point redirects straight to the new location rather than through intermediary URLs or catch-all pages.
Audit existing redirects
Many sites already carry several layers of redirects from previous restructures. If you ignore them, they slow down responses and dilute link equity.
Use a crawler such as Screaming Frog to:
- Identify all existing redirects and the chains they create.
- Update internal links so they point directly at the final live URL.
- Remove or consolidate redundant redirects where they no longer serve a purpose.
This work gives the new site a clean redirect structure and helps search engines crawl more quickly.
Decide on your AMP strategy
If the current setup includes Accelerated Mobile Pages (AMP), decide how you want to handle them on the new platform before you build templates.
You can:
- Migrate AMP content to WordPress and keep AMP templates that still follow AMP HTML requirements.
- Retire AMP and redirect AMP URLs to the canonical responsive version instead.
In both cases, work through these steps:
- Audit all AMP URLs and note which ones still matter for organic performance.
- Implement 301 or 308 redirects from each AMP URL to its final destination.
- Use the Google AMP validator to confirm that any remaining AMP pages pass validation.
Keep canonical tags consistent and clear so Google understands which version of a page you want to show in search.
Fix redirect chains before launch
Redirect chains drain crawl budget and slow down users. Before launch, run tests and make sure every redirect jumps straight to the final URL.
Look for:
- Redirects that hop through several URLs before they settle.
- Mixed redirect types, such as a 302 that points to a 301 target.
- Internal links that still reference old URLs instead of the final ones.
Clean chains wherever you spot them. When every redirect moves in a single hop, you improve crawl efficiency, response times, and user experience.
Update your XML sitemap
As soon as the new site goes live, adjust XML sitemaps so they match the new URL structure. Treat the sitemap as a live reflection of your canonical URLs, not as a historical record.
Work through this checklist:
- Remove old, redirected, or 404 URLs from all XML sitemaps.
- Keep only URLs that return a 200 status and sit in an indexable state.
- Check canonical tags so each sitemap URL declares the correct canonical version.
- Submit the new sitemap in Google Search Console.
Use the Page Indexing report in Search Console to track indexation trends in the weeks after launch. This report highlights coverage issues, soft 404s, and other crawl problems that need attention.
Migrate and optimise image URLs
Images influence search visibility, user engagement, and perceived quality. Treat them as part of the SEO migration, not as an afterthought.
During the migration, you:
- Map old image file paths to new file paths so you avoid broken images.
- Update all HTML, CSS, and JavaScript references so they point at the new URLs.
- Reapply descriptive alt text and image-related structured data (for example
ImageObjectinside Article or Product schema). - Create and submit an image sitemap if images play a major role in discovery.
Google Image Search often delivers incremental traffic and assists conversions, so this work supports more than accessibility and design.
Restructure URLs with SEO in mind
If you plan to refactor URL patterns, use the migration window to introduce cleaner, more descriptive slugs. Clear URLs help users and search engines understand content quickly.
Follow these principles:
- Use lowercase, hyphenated words in every slug.
- Strip out unnecessary numbers, parameters, tracking codes, or session IDs.
- Reflect the main topic of the page inside the slug.
For example:
- ❌
example.com/blog-post-38294-xyz/ - ✅
example.com/inspiration/bedroom-design-ideas/
Once you finalise the new structure, update redirects, sitemaps, internal links, and structured data so they all reference the new patterns.
Find and fix 404 errors
After launch, expect to uncover a few broken URLs. Treat 404s as signals, not as automatic failures.
Use a crawler to:
- Identify 404 responses that affect pages you still want to serve.
- Create new redirects for any missed pages that have obvious equivalents.
- Update internal links that still point to deleted or moved URLs.
Allow 404s for content that you retired intentionally and that no longer deserves a replacement. Google treats normal 404s as part of the web. Use Google Search Console’s Page Indexing and crawl reports to spot new 404 issues that appear after launch and decide which ones need action.
Update your most valuable backlinks
External links still act as one of the strongest signals in organic search. A migration gives you a reason to tidy them up.
Start by:
- Exporting backlink data from tools such as Ahrefs or Google Search Console.
- Identifying links that still hit old URLs, especially those that now redirect.
- Prioritising high-authority referrers and pages that drive engaged traffic or conversions.
Reach out to those partners and request updates so their links point directly to the new URLs. Redirects will still catch legacy traffic, but direct links send a stronger signal and often speed up reindexing of key pages.
Post launch: monitor and optimise
A successful migration continues beyond launch day. Over the following weeks, track performance and fix any issues as soon as they appear.
Monitor:
- Crawling and indexing behaviour in Google Search Console.
- Organic traffic, engagement, and conversions in GA4.
- Keyword performance using Search Console and rank-tracking tools.
- Errors or warnings related to response codes, structured data, and Core Web Vitals.
You usually see some volatility in the first two to four weeks after launch. Treat this timeframe as a rule of thumb rather than a promise. Focus on resolving issues quickly and continue to optimise the new setup as fresh data arrives.
Example: On a recent 10,000-URL blog migration, a clear redirect map, early 404 fixes, and weekly Search Console checks helped maintain around 95% of organic traffic within six weeks, with several long-tail pages improving on previous rankings.
Useful Google resources
Final checklist
- Keyword audit completed and mapped to the new site.
- Long-tail opportunities identified and prioritised.
- Blog content migrated, reformatted, and re-optimised.
- Redirects planned and implemented for all important URLs.
- Legacy redirect chains reviewed and cleaned.
- AMP strategy agreed and implemented.
- XML sitemaps updated, submitted, and monitored.
- Image URLs migrated with alt text and structured data reapplied.
- URL structures refactored with SEO-friendly slugs.
- High-priority 404s fixed and irrelevant legacy URLs allowed to retire.
- Key backlinks reviewed and updated where possible.
- Post-launch metrics tracked and optimisation work scheduled.
Website migrations always introduce risk, but they also create a chance to strengthen your SEO foundation. With deliberate preparation, a clear redirect strategy, and disciplined post-launch monitoring, you can move to a better platform and keep organic performance moving in the right direction.
If you want support with the strategy or implementation, get in touch and we can walk through a migration plan that matches your stack, timelines, and targets.